Updated November 1, 2026. Roblox Studio’s latest creator-tool improvements target a familiar development bottleneck: getting a 3D asset from “it imports” to “it looks right and behaves the way I need.” New texture-generation controls let creators restyle existing meshes, Segment Any Mesh extends part separation to imported models, and image previews give creators more ways to steer generated models before adding them to a project.
Roblox detailed the changes on September 23, 2026, with further guidance in Creator Hub documentation and follow-up staff explanations. These are not one-click game-building features. They are workflow tools: faster material iteration, more editable model parts, and better visual control before committing a generated asset. The biggest benefit may be for small teams that need to prototype quickly without giving up the ability to refine their work.
What changed in Roblox Studio?
The update brings together three related improvements:
-
Improved texture generation: creators can apply a generated texture to one or more selected meshes, including existing models, through the Studio ribbon, the right-click Generate menu, or Assistant’s
/generate_texturecommand. -
Segment Any Mesh: creators can split an imported mesh into named components with Assistant’s
/segment_meshworkflow, making individual parts easier to customize or give behavior. -
Image input and previews: creators using
/generate_meshor/generate_procedural_modelcan use a reference image and review four generated image options before choosing a result.
These features affect different stages of asset creation. Texture generation changes the surface appearance. Segmentation changes how a model is divided for editing and scripting. Image previews help creators decide what a generated asset should look like before it enters the experience.
Texture Generation: more control over existing 3D assets
The updated Texture Generator is designed for a mesh or a sensible group of meshes that form one coherent object. A creator selects the object, describes the intended material or style with text or a reference image, previews the result, and then generates the texture. A developer no longer needs to create a new model just to change the look of an existing prop.
Roblox documents two generation modes. Fast mode produces a 1K diffuse texture for quick iteration. Quality mode creates a 4K physically based rendering (PBR) texture for more detailed results, with a longer wait. Roblox says previews can appear in a few seconds; full Quality generation can take a couple of minutes.

Where to find the texture tool
- Select a mesh or a Model made from a coherent group of MeshParts and use the Texture option in the Model ribbon.
- Right-click the selected object and choose Generate → Texture.
- Open Assistant and enter
/generate_texture.
Creators can describe a material in plain language, such as weathered red leather, brushed metal, painted wood, or patterned fabric. Useful prompt details include material, color, pattern, wear, and visual style. The goal is to make a preview that can be judged against the asset’s purpose, not simply to produce a visually busy surface.
Texture Generator is not the best choice for every surface. Roblox recommends Material Generator for repeating or tiled surfaces such as wood floors and cobblestone paths. Texture Generator is intended for textures that make sense in the context of the selected 3D asset. Selecting a scattered collection of unrelated meshes or several identical meshes in one operation can also lead to poor results.


Segment Any Mesh: turn one imported object into editable parts
Segmentation is especially useful for developers who import models from external 3D tools. A model that arrives as one mesh can be difficult to customize: a car’s wheels may need different materials, a robot’s arms may need separate animations, or a sword’s hilt may need a different effect from its blade. Segment Any Mesh is intended to make those components individually accessible inside Studio.
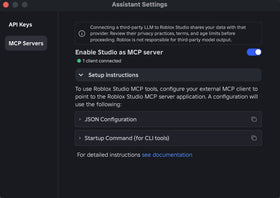
To use it, select the imported MeshPart itself in the workspace—not its parent Model—open Assistant, and enter /segment_mesh. The dialog asks for names for the parts you want to identify. Roblox says creators can enter up to five part names per run. If the model needs more, run the command again on one of the resulting parts.
Why part names matter
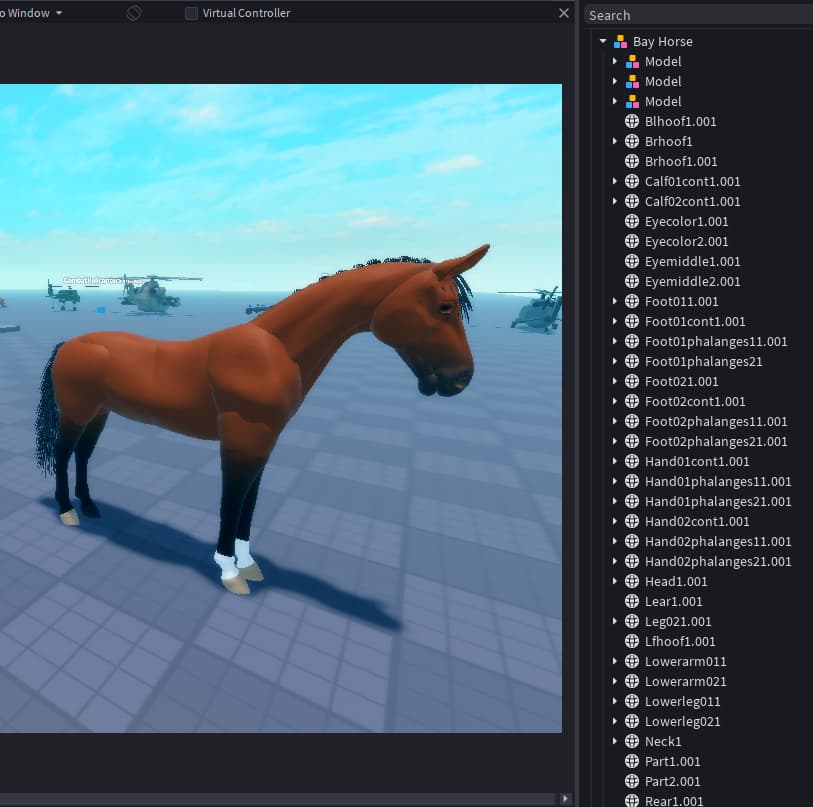
Part names are not just labels. Roblox staff explained that Assistant uses the names supplied by the creator to identify the matching regions, then an algorithm performs the cut while keeping the mesh and UVs intact. The AI helps interpret what the creator means by “body,” “wheel,” or “handle”; the final separation is not simply a brand-new AI-generated replacement model.
That distinction is useful, but it does not mean every mesh can be separated perfectly. Roblox staff cautioned that results depend on how the input mesh is built. Overlapping triangles between intended parts can prevent a clean split. Imported-mesh segmentation remains an early preview, and Roblox has said it wants to add more algorithms to support a wider range of meshes.
Good first projects for segmentation
Creators are likely to get the most value from models with clearly distinguishable components: a vehicle with a body and four wheels, a tool with a handle and head, or a weapon with a blade and grip. Use concrete names that describe visible components. “Left front wheel” is more informative than “part one.” If a mesh is heavily fused, tangled, or has overlapping geometry, inspect the result carefully before building scripts around it.
Image previews give creators a better choice before generation
The third improvement affects the model-generation workflow. When creators use /generate_mesh or /generate_procedural_model, they can review four generated image options and choose the direction that best matches their project. They can also provide a reference image. For /generate_procedural_model, the reference is uploaded through the Hint Image control; for /generate_mesh, the creator switches the input mode from Prompt to Image.

A reference image is a guide, not a guarantee of a pixel-perfect copy. Creators should inspect the generated previews, check the geometry in Studio, and test the model in the actual scene before publishing it.
What the tools mean for Roblox developers
The combined update makes the asset pipeline more iterative. A creator can start with an imported or generated model, adjust its appearance, split it into useful pieces, and then add behavior to those pieces. That can reduce the number of trips between Studio and an external 3D package for routine changes.
For a small team building a vehicle game, an imported car mesh can be segmented so its wheels and body are handled separately. The body can receive a painted-metal texture, while the wheels use rubber. A script can then rotate or replace the wheels without requiring the developer to rebuild the entire asset. For a fantasy game, a creator could separate a sword’s grip and blade, apply different materials, and attach a visual effect to only one component.
That is a more meaningful productivity gain than simply generating more objects. The value comes from keeping generated and imported assets editable after the first result. Still, these tools are best treated as accelerators—not substitutes for checking topology, UVs, visual quality, performance, moderation, and intellectual-property rights.
Limitations creators should know before using them
- Texture quality depends on the asset and prompt. A detailed prompt and useful generation angle can improve the result, but creators should preview and refine rather than assume the first output is final.
- Use Material Generator for tiled surfaces. Repeating floors and broad surface patterns may be better suited to a different tool.
- Imported-mesh segmentation is still early preview. The geometry and topology of the source mesh affect whether parts can be separated cleanly.
- Part names guide the split. Use clear names that match real components, and inspect the result before attaching scripts.
- Generated previews are choices, not guarantees. Four options help compare directions, but the selected model still needs testing in the game environment.
How to try the new Roblox Studio tools
- Update Roblox Studio and check the relevant Creator Hub documentation for current availability and any beta requirements.
- Open a test place and save a backup of the imported model before experimenting.
- For texture work, select one coherent mesh or model and open Texture Generator from the Model ribbon, right-click menu, or Assistant command.
- For imported mesh segmentation, select the MeshPart and run
/segment_meshin Assistant. Enter up to five clear component names. - For generated models, try a text prompt or reference image, compare the four previews, and inspect the selected result before adding it to the place.
- Test the model in play mode and check its materials, collision, scripts, and performance before publishing.
Frequently asked questions
What is Roblox Studio’s new Texture Generator?
It is a Studio tool that creates custom textures for selected meshes from text or image prompts. The documented modes include a faster 1K diffuse option and a higher-detail 4K PBR option.
Can Roblox Texture Generator change an existing model?
Yes. Roblox’s September 2026 announcement says creators can restyle one or multiple existing meshes using the ribbon, right-click Generate menu, or Assistant’s /generate_texture command.
What does Segment Any Mesh do?
It splits an imported mesh into named components so creators can customize materials, attach scripts, or replace individual pieces without editing and reimporting the original model.
How do I segment an imported mesh in Roblox Studio?
Select the MeshPart itself, open Assistant, enter /segment_mesh, name up to five parts, and confirm the segmentation. Run the command again on a resulting part if you need more divisions.
Does mesh segmentation use AI?
Roblox staff explained that AI interprets the named regions, while an algorithm performs the cut and preserves the mesh and UVs. Results still depend on the source mesh’s topology.
Can Roblox Studio generate a mesh from an image?
Yes. The updated generation workflow lets creators provide an image reference for /generate_mesh and /generate_procedural_model, then review four generated image options before choosing a result.
Is Segment Any Mesh fully released?
Roblox describes imported-mesh segmentation as an early preview. Creators should expect results to vary with the geometry and construction of the source mesh.
Should I use Texture Generator for a wood floor?
Roblox recommends Material Generator for repeating or tiled surfaces such as wood floors and cobblestone paths. Texture Generator is better suited to a texture that is specific to the selected 3D asset.
Related Roblox creator coverage
- Roblox Build AI: 70,000+ Games Created as AI Game Development Takes Off
- Roblox Scene Generation Beta: How Studio Turns Prompts and Images Into Editable Game Environments
Official sources and further reading
- Roblox Creator Forum: Introducing New Texture Generation Tools, Segment Any Mesh, and Image Previews (September 23, 2026)
- Roblox Creator Hub: Texture Generator documentation
- Roblox Creator Hub: Assistant for Studio guide, including mesh segmentation and image previews
- Roblox Creator Forum: Early Preview — Generate 3D Models Segmented Into Multiple Parts
- Roblox staff clarification on how mesh segmentation identifies and cuts named parts
By Shivam Das